Git On Windows
Here is a possible way to use git on Windows to work on a git repository in GitLab. The nice thing about GitLab is it uses git, so any Windows git client can be used. I prefer command line myself, but there are GUI options including the git supplied one which I will be using.
Installing software
I suggest using chocolatey to manage software. Follow the installation instructions on the chocolatey website to do this.
To install the chocolatey GUI use
choco install chocolateyguiNow we have a nice GUI to manage software. Now install Git. I chose the Git (Install) package.
Create an SSH Key
Create an ssh key. I suggest using the same method as in my GitLab and SQL Developer post, so the key will also work with that if necessary:
ssh-keygen -t rsa -m PEM -C "my@email.address"Accept all the defaults and use an empty passphrase. This creates a key and tells you where it put it.
Upload it to GitLab
This part is cut and pased from my GitLab and SQL Developer post!
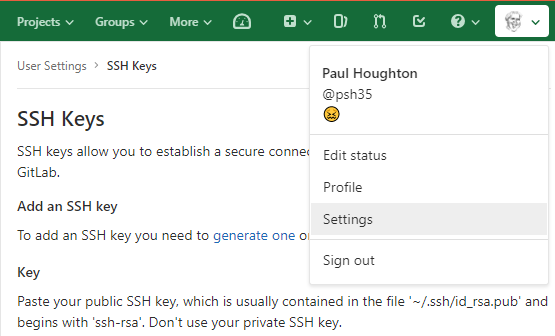
The public key needs to be imported into GitLab. Cick on your avatar on the top right, and click Settings in the menu that comes up.
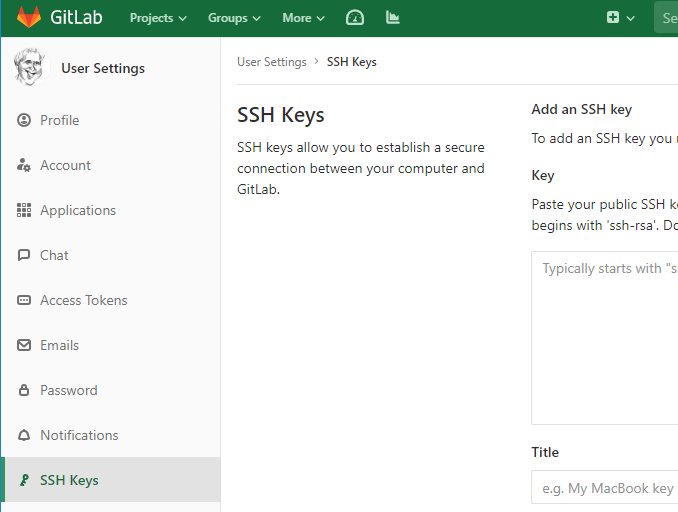
Click on SSH Keys in the left bar, then paste the contents of id_rsa.pub into the large box that appears. The title gets populated from the key, change it so you can recognise it later, then save it by clicking Add key. This can now be used by the Git command line.
Clone a Reopsitory
Now we have told GitLab about the desktop, we can clone a repository.
Open the repository in GitLab and click the Clone button at the top right. Click the copy
button under Clone with SSH.

Start up the Git GUI.
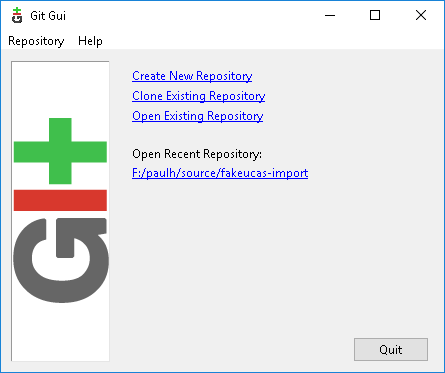
click Clone Existing Repository
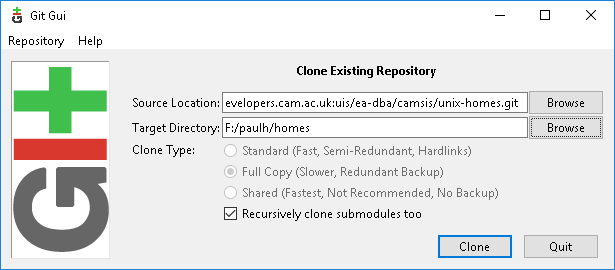
Paste the URL into the Source Location box, and select a target directory for the clone to end up in. Note that the last directory shouldn’t exist.
Click Clone.
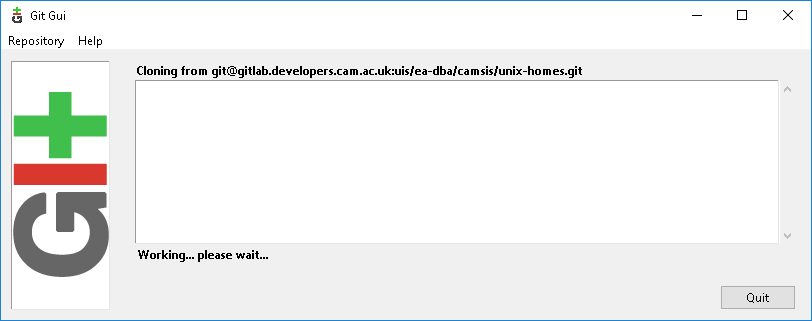
The cloning progress window appears, then the GUI below appears.
Alternatively this can be done on the command line by changing to a convenient directory and doing:
git clone <url>If this doesn’t work try the instructions in this stackoverflow question and see if it helps.
The repository has been copied on to the desktiop.
Make changes
Now that the repo is cloned we can make changes as we like. Before making any changes, always do a
git pullto make sure it is up to date, or in the GUI select Remote -> Fetch from -> Origin from the menu. Then edit the files as required.
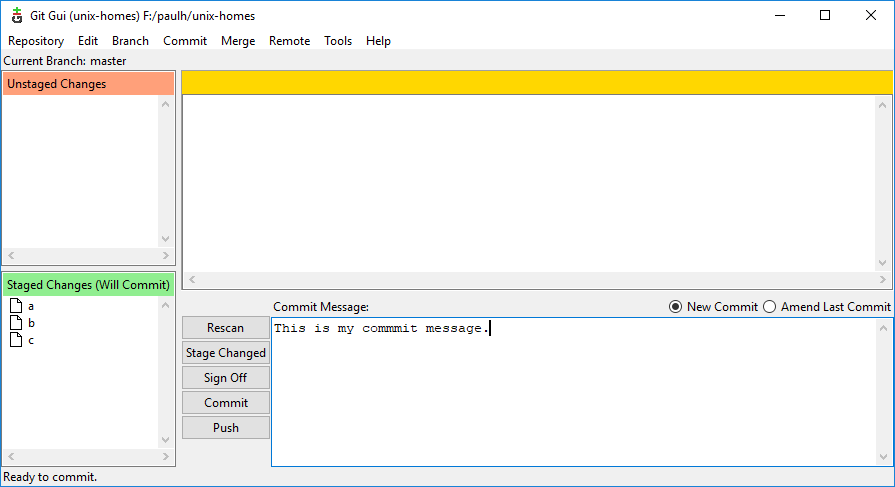
Now we need to stage the changed files. In the Git GUI, click Stage Changed or in the command line, use
git add <list of files>The GUI shows what the status of the files are, which have been changed, and which have been staged.
git statusto check what was done, or else the GUI reflects the current state.
One you are happy, you can commit the changes. At this stage it is wise to do a git pull again to ensure that we have any changes made remotely, othewise
a merge will have to be done. Then the following can be done:
git commitWhich starts an editor sesion for the commit message, or
git commit -m "changes made"which puts the commit message on the command line. In the GUI, the commit message goes in the large Commit Message box (Bottom right), and then press commit.
Lastly the changes need to be sent back to GitLab using:
git pushConclusion
Once it is set up the Git workflow is quite simple. I prefer to use the command line, which results in the following workflow:
git pullmake changes
git status
git add
git pull
git commit
git push
This means learning 5 commands and looping through them. I find it quite simple.